Other articles in the series
In this post, we will implement the customer management feature. As you can see the functionality provided by product management is very similar to that should be provided by customer management feature. The data to be stored is different, but the provided operations are similar like creation, editing etc. For the same reason, we can simply copy the components/product folder and rename it as components/customer. Rename all occurrences of Product with Customer. So our directory structure looks like below.
customer
├── AddCustomer.vue
├── CustomerList.vue
├── CustomerView.vue
└── EditCustomer.vue
Modeling Customer in Typescript
types/types.ts file contains our Customer structure, we generated from the database.
export interface Customer {
  updated_at: Date;
  pincode: string;
  phone: string;
  name: string;
  inserted_at: Date;
  id: number;
  details: object;
}
We can provide an implementation for Customer interface just like what we did for Product. Here we use the Mapped Types in Typescript for cleaner constructor. Mapped Types allows us to create new types based on old types. For example the Partial
// Makes all the fields in T optional with ?
type Partial<T> = {
    [P in keyof T]?: T[P];
}
We can also define other types like Readonly as below.
type Readonly<T> = {
    // Make all fields in T, readonly
    readonly [P in keyof T]: T[P];
}
Implementing Customer
Our implementation of Customer can be as follows.
class CustomerImpl implements Customer {
  // Initialize variable with default variables.
  inserted_at: Date = new Date();
  updated_at: Date = new Date();
  pincode: string = '';
  phone: string = '';
  name: string = '';
  id: number = 0;
  details: object = {};

  /* Mapped Types in Typescript.
   * Partial<T> makes all fields of T as optional.
   * This allows us to just update the values for passed in init(which itself is optional with?) and assigns to our object.
   * Then we initialize like new CustomerImpl({name: "MyName"})
   */
  public constructor(customer?: Partial<Customer>) {
    Object.assign(this, customer);
  }
}

// Factory methods
export function getEmptyProduct() {
  return new ProductImpl();
}

export function getEmptyCustomer() {
  return new CustomerImpl();
}
Talking with Phoenix Backend
In order to communicate with our Phoenix backend, we need to create a customerService like productService. For this we copy services/productService.ts as customerService.ts and simply replace product with customer and Product with Customer. This is possible as we have similar functionality and uniform interface to our backend server. Our resulting customerService is as follows.
import axios, { AxiosPromise } from 'axios';
import { Customer, getEmptyCustomer } from '@/types/types';

export class CustomerService{

  private endpoint: string;
  private entity: string;

  constructor(endpoint: string, entity: string) {
    this.endpoint = endpoint;
    this.entity = entity;
  }

  public getAllRequest(): AxiosPromise<{ 'customers': Customer[] }> {
    const response = axios.get(`${this.endpoint}${this.entity}`);
    return response;
  }

  public createCustomer(data: Customer): AxiosPromise<{ 'customer': Customer }> {
    return axios.post(`${this.endpoint}${this.entity}`, { customer: data });
  }

  public updateCustomer(identifier: number, data: Customer): AxiosPromise<{ 'customer': Customer }> {
    return axios.put(`${this.endpoint}${this.entity}/${identifier}`, { customer: data });
  }

  public getCustomer(identifier: number): AxiosPromise<{ 'customer': Customer }> {
    return axios.get(`${this.endpoint}${this.entity}/${identifier}`);
  }

  public deleteCustomer(identifier: number): AxiosPromise<any> {
    return axios.delete(`${this.endpoint}${this.entity}/${identifier}`);
  }

  public getEmpty(): Customer {
    return getEmptyCustomer();
  }

}
In order to persist the customer data, we need to define the Vuex module. Just like customerService it is very similar to store/modules/products.ts. So we follow the same procedure as above. Copy the products.ts as customers.ts and replace all occurrences of product with customer and Product with Customer and we are ready to go.
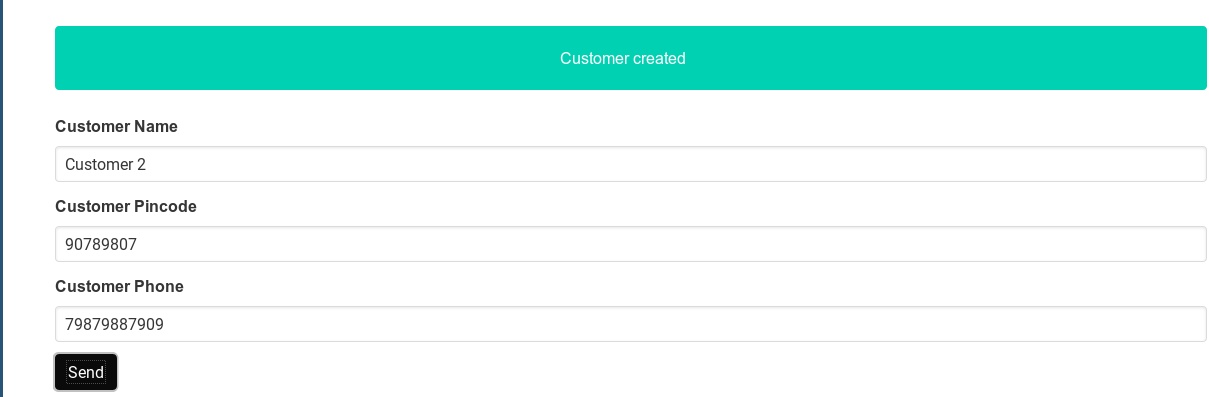
Building the Customer View
In order to display the customer details, we need the CustomerView.vue. We can see it is similar to our Productview.vue. The implementation is as follows.
<template>
  <div>
    <div class="field">
      <div class="control">
        <label class="label" for="customerName">{{ $t('customerName.label') }}</label>
        <!-- We bind currentCustomer.name to this input field -->
        <input class="input" id="customerName" type="text" v-model="currentCustomer.name" />
      </div>
    </div>

    <div class="field">
      <div class="control">
        <label for="customerPincode" class="label">{{ $t('customerPincode.label') }}</label>
        <input class="input" id="customerPincode" type="text" v-model="currentCustomer.pincode" />
      </div>
    </div>

    <div class="field">
      <div class="control">
        <label class="label" for="customerPhone">{{ $t('customerPhone.label') }}</label>
        <input class="input" id="customerPhone" type="text" v-model="currentCustomer.phone" />
      </div>
    </div>

    <div class="field">
      <div class="control">
        <slot></slot>
      </div>
    </div>
  </div>
</template>

<script lang='ts'>
import { Customer } from '@/types/types.ts';
import { Component, Prop } from 'vue-property-decorator';
import Vue from 'vue';

@Component({
  components: {},
})
export default class CustomerView extends Vue {
  // Prop are data values that are passed from parent component to child component.
  @Prop()
  public currentCustomer!: Customer;
}
</script>

<style lang='sass' scoped>
</style>

<i18n>
{
  "de": {
      "customerName": {
        "label": "Kunde Name"
      },
      "customerPincode": {
        "label": "Kunde postleitzahl"
      },
      "customerPhone": {
        "label": "Kunde Stock"
      }
  },
  "en": {
      "customerName": {
        "label": "Customer Name"
      },
      "customerPincode": {
        "label": "Customer Pincode"
      },
      "customerPhone": {
        "label": "Customer Phone"
      }
  }
}
</i18n>
Now implementing CustomerList.vue and AddCustomer.vue is very straightforward as both of them simply use CustomerView.vue component. To implement CustomerList simply replace Product with Customer and product with customer. Same is the case for AddCustomer component too.
Now the only thing left is to add the customer management functionality to our src/router.ts, so that we can actually use it. In router we add the following code and we are ready for action.
    {
      path: '/customers',
      name: 'customers',
      component: () => import('./components/customer/CustomerList.vue'),
    },
    {
      path: '/customers/add',
      name: 'add-customer',
      component: () => import('./components/customer/AddCustomer.vue'),
    },
    {
      path: '/customers/edit/:id',
      name: 'edit-customer',
      component: () => import('./components/customer/EditCustomer.vue'),
      props: true,
    },
Now go to localhost:8080/customers/add and we can add customers, just like products.
Testing Customer Functionity using Jest
Now for the test cases, just copy test/unit/product and rename to test/unit/customer. Then replace all occurrences of product with customer and Product and Customer. The resulting test/unit/customer/AddCustomer.spec.ts will be as follows.
import 'jest';
import { mount } from '@vue/test-utils';
import AddProduct from '@/components/product/AddProduct.vue';
import { Product } from '@/types/types';
import products from '@/store/modules/products';
import { doesNotReject } from 'assert';

// We mock the whole store/modules/products module, with jest.
jest.mock('@/store/modules/products', () => ({
  service: {
    // jest.fn creates mock function which replaces actually implementation of function.
    // It captures all calls to function with arguments and more.
    createProduct: jest.fn(() => async (p: Product) => {
      return {}
    }),
    getEmpty: () => {
      return {};
    },
  },
}));

describe('AddProduct.vue', () => {
  test('Checks if the product is sent correctly when clicking submit button', async () => {
    // mount, mounts the component AddProduct in isolation and returns a wrapper with helper functions.
    const wrapper = mount(AddProduct, {
      mocks: {
        // Here we pass a mock for global function $t. $t is the translation function from vue-i18n
        $t: () => { },
      },
    });
    // Finds the element with id productName
    const inputV = wrapper.find('#productName');
    // We manually set the value of input field to testNamer
    inputV.setValue('testNamer');
    // And we trigger a click event to check if required functions are getting called.
    wrapper.find('[type=\'submit\']').trigger('click');

    // We need to cast to HTMLInputElement, because Typescript by default provides a generic HTMLElement,
    // which lacks some function from an input field.
    const t = inputV.element as HTMLInputElement;
    // Check if the value we set before clicking submit is sent to createProduct function.
    expect(products.service.createProduct).toBeCalledWith({ name: 'testNamer' });
  });

  test('Check if product created notification displayed when showNotification is true', async () => {
    // mount, mounts the component AddProduct in isolation and returns a wrapper with helper functions.
    const wrapper = mount(AddProduct, {
      mocks: {
        // Here we pass a mock for global function $t. $t is the translation function from vue-i18n
        $t: () => { }
      },
    });
    // We set showNotification to true and wait for Vue to update DOM by waiting for vm.nextTick
    wrapper.vm.$data.showNotification = true;
    await wrapper.vm.$nextTick();
    // Search for element with class=notification
    const t = wrapper.find('.notification');
    // Assert the element is visible.
    expect(t.isVisible()).toBe(true)
  })
});
As you can see by now, we got a lot of duplicate code. These can be easily fixed by refactoring which we will do in the next post.