Other articles in the series
The backend related code for this post is available here.
The front-end related code for this post is available at here.
Adding Order Management
Before we get started with adding order management, let’s make some server-side changes to enforce foreign key constraints. This will make the database querying easier with respect to foreign keys and also provides us with helper function when working with ecto.
Renaming Fields in Ecto Schema
To start with, lets write a migration to rename all fields in schemas to end with _id if it refers to a foreign key. This will make all foreign keys explicit and also will be useful in future, when we are writing ecto queries.
mix ecto.gen.migration rename_fields_for_foreign_keysAnd fill in repo/migrations/rename_fields_for_foreign_keys.exs with following content.
defmodule Ms.Repo.Migrations.RenameFieldsForForeignKeys do
  use Ecto.Migration

  def change do
    rename table("order_items"), :order, to: :order_id
    rename table("order_items"), :product, to: :product_id
    rename table("orders"), :customer, to: :customer_id
    rename table("deliveries"), :order_item, to: :order_item_id
  end
end
Once we have changed the database tables, the schema files should be changed to reflect it.
Let’s take a look at the changes in lib/ms/customer_management/customer.ex file.
defmodule Ms.CustomerManagement.Customer do
  use Ecto.Schema
  import Ecto.Changeset

  schema "customers" do
    field :details, :map
    field :name, :string
    field :phone, :string
    field :pincode, :string
    # has_many tells that there can be multiple orders from a customer
    # This can be used to preload all orders from a customer
    has_many :orders, Ms.OrderManagement.Order

    timestamps()
  end

  @doc false
  def changeset(customer, attrs) do
    customer
    |> cast(attrs, [:name, :phone, :pincode, :details])
    |> validate_required([:name, :phone, :pincode, :details])
  end
end
As you can see in comments we added has_many. It is a macro, which does not do anything to database, but allows us to access the corresponding Ms.OrderManagement.Order via the foreign key. It also allows us to easily prefetch it, without writing any SQL.
Similarly we change lib/ms/delivery_management/delivery.ex as follows
defmodule Ms.DeliveryManagement.Delivery do
  use Ecto.Schema
  import Ecto.Changeset

  schema "deliveries" do
    field :address, :map
    field :details, :map
    field :fare, :float
    # If a name ends with _id ecto consider it to be an id or a foreign key id.
    field :order_item_id, :id
    # belongs_to says that this deliveries schema has a foreign key reference to customers schema
    # Just like has_many, it too offers more flexibility, when querying using ecto
    belongs_to :customer, Ms.CustomerManagement.Customer

    timestamps()
  end

  @doc false
  def changeset(delivery, attrs) do
    delivery
    |> cast(attrs, [:fare, :address, :details])
    |> validate_required([:fare, :address, :details])
  end
end
belongs_to adds customer_id foreign key to our schema and also allows fetching of Ms.CustomerManagement.Customer corresponding to the customer_id key. We do the same for lib/ms/inventory_management schemas too. If you find these confusing look at the excellent tutorial at Elixir School about ecto and associations.
Lets run our migrations
mix ecto.migrateNow that we are done with migrations, let add support for order items for an order. Lets start with adding some constraints on lib/ms/order_management/order_item.ex. In order for an order_item to be added to database, it should be part of an order. We can enforce it using foreign_key_constraint.
Let’s consider our code.
defmodule Ms.OrderManagement.OrderItem do
  use Ecto.Schema
  import Ecto.Changeset

  schema "order_items" do
    field :amount, :integer
    field :unit_price, :float
    belongs_to :product, Ms.InventoryManagement.Product
    belongs_to :order, Ms.OrderManagement.Order

    timestamps()
  end

  @doc false
  def changeset(order_item, attrs) do
    order_item
    |> cast(attrs, [:amount, :unit_price, :order_id])
    |> validate_required([:amount, :unit_price, :order_id])
    |> foreign_key_constraint(:order)
  end
end
Here foreign_key_constraint(:order) means that the :order_id of order_items schema, should already exist in orders table. Otherwise the changeset will be invalid. This makes sure that, we don’t accidentally insert any invalid data.
Modeling JSON representation for Order
Now that we have implemented our order schema with order_items, one question remains. When we ask for an order, should it automatically also provide all associated order_items ?. In our case, I would say yes. Almost every time, we fetch our order, we will also need order_items. So why not always preload order_items along with an order. In order to render order_items with order, we will need to provide a serializer for order_item. For this we change our ms/order_management/order_item.ex as follows.
defmodule Ms.OrderManagement.OrderItem do
  use Ecto.Schema
  import Ecto.Changeset

  # Automatically constructs a JSON with amount, id, unit_price, order_id when we render an order_item.
  @derive {Jason.Encoder, only: [:amount, :id, :unit_price, :order_id]}
  schema "order_items" do
    field :amount, :integer
    field :unit_price, :float
    belongs_to :product, Ms.InventoryManagement.Product
    belongs_to :order, Ms.OrderManagement.Order

    timestamps()
  end

  @doc false
  def changeset(order_item, attrs) do
    order_item
    |> cast(attrs, [:amount, :unit_price, :order_id])
    |> validate_required([:amount, :unit_price, :order_id])
    |> foreign_key_constraint(:order)
  end
end
As per the comment @derive uses the Jason encoder to automatically provide us with a JSON representation for order_item. Now the only step left is to always preload all order requests with order_items field. This can be achieved by updating the lib/ms/order_management.ex code as follows.
  @doc """
  Gets a single order.

  Raises `Ecto.NoResultsError` if the Order does not exist.

  ## Examples

      iex> get_order!(123)
      %Order{}

      iex> get_order!(456)
      ** (Ecto.NoResultsError)

  """
  def get_order!(id), do: Repo.get!(Order, id) |> Repo.preload(:order_items)

  @doc """
  Creates a order.

  ## Examples

      iex> create_order(%{field: value})
      {:ok, %Order{}}

      iex> create_order(%{field: bad_value})
      {:error, %Ecto.Changeset{}}

  """
  def create_order(attrs \\ %{}) do
    response = %Order{}
    |> Order.changeset(attrs)
    |> Repo.insert()

    case response do
      {:ok, order} ->
        Enum.map(attrs["order_items"], fn oi -> create_order_item(Map.merge(oi, %{"order_id" => order.id})) end)
        {:ok, order |> Repo.preload(:order_items) }

      {:error, e} -> {:error, e}
    end
  end
For both get_order and create_order, we preload order_items using Repo.preload(:order_items). Let’s run our tests to see if everything went right.
mix testFixing Failing Tests
Unfortunately some of our tests fail. Most of them fail because, when testing order_items, we don’t provide a valid order_id. It can be easily fixed, by first creating an order and then passing the order_id from the created order into the order_item request. Now some other tests fails due to mismatch in struct structure in Elixir. It can fixed by replacing all :atom keys in structures to string. For example, we need to change from %{name: “Name”} to %{“name” => “Name”}. This is required because in Elixir :name is not the same as “name”.
Tests also expose that we have a bug in handling cascading deletes. Our current migration in repo/migrations/20190613185803_create_order_items.exs works as follows.
defmodule Ms.Repo.Migrations.CreateOrderItems do
  use Ecto.Migration

  def change do
    create table(:order_items) do
      # When a product is deleted, we do nothing. This is wrong as
      # the product we need to sell doesn't exist. We should replace
      # it to cascading delete.
      add :product, references(:products, on_delete: :nothing)
      add :order, references(:orders, on_delete: :nothing)
    end
  end
end
To allow deleting of products, we need to change on_delete: :nothing to on_delete: :delete_all. This deletes all order_items when a product is deleted.
Note: In some cases, it is required to preserve all order history. But as you will see later, this can be easily fixed.
So lets create a new migration to fix this issue.
mix ecto.gen.migration change_constraints_on_order_itemsAnd add the following code
defmodule Ms.Repo.Migrations.ChangeConstraintsOnOrderItems do
  use Ecto.Migration

  def change do
    drop constraint("order_items", "order_items_product_fkey")
    drop constraint("order_items", "order_items_order_fkey")

    alter table(:order_items) do
      modify(:product_id, references(:products, on_delete: :delete_all))
      modify(:order_id, references(:orders, on_delete: :delete_all))
    end
  end
end
Run our migration and then the tests.
mix ecto.migrate
mix test
Now all our tests are green again :D. So now that we have completed the whole backend requirements for implementing orders, we will start with implementing the UI for orders.
Building Order Views
Before we start implementing UI for order management, we need to change the unitPrice and creationDate to unit_price and creation_date in client side too. This is pretty easy as all our types are defined in src/types/types.ts.
The changed code is as follows.
export interface OrderItem {
  updated_at: Date;
  // Changed from unitPrice
  unit_price: number;
  product_id: number;
  order_id: number;
  inserted_at: Date;
  id: number;
  amount: number;
}
export interface Order {
  updated_at: Date;
  message: string;
  inserted_at: Date;
  id: number;
  details: object;
  customer_id: number;
  // creationDate
  creation_date: Date;
}
Now we get started with implementing our order management UI. Our workflow for adding a new order should be as follows.

As a starting step, lets copy required files from product management and rename all occurrences of Product to Order and all product to order. This also applies to files also.
So our component directory structure for order should look as follows
order
├── AddOrder.vue
├── EditOrder.vue
├── OrderList.vue
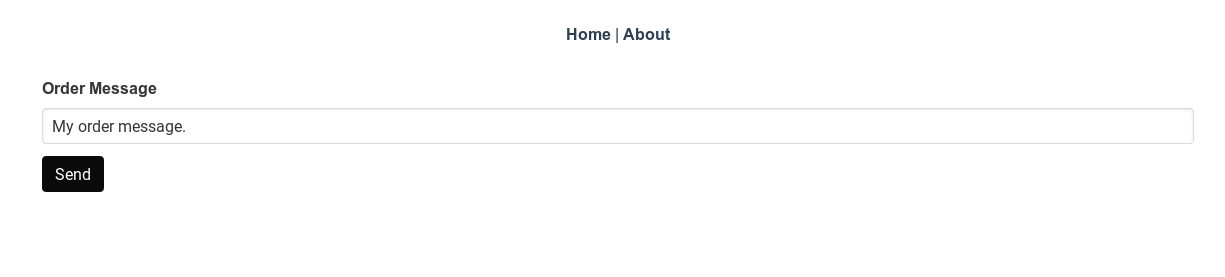
└── OrderView.vueSo our src/components/order/OrderView.vue looks as below.
<template>
  <div>
    <div class="field">
      <div class="control">
        <label for="orderMessage" class="label">{{ $t('orderMessage.label') }}</label>
        <input class="input" id="orderMessage" type="text" v-model="currentOrder.message" />
      </div>
    </div>

    <ul>
      <li v-for="item in currentOrder.order_items" :key="item.id">{{item}}</li>
    </ul>

    <div class="field">
      <div class="control">
        <slot></slot>
      </div>
    </div>
  </div>
</template>

<script lang='ts'>
import { Order, Customer, getEmptyCustomer } from '@/types/types.ts';
import { Component, Prop } from 'vue-property-decorator';
import Vue from 'vue';

@Component({
  components: {},
})
export default class OrderView extends Vue {
  // Prop are data values that are passed from parent component to child component.
  @Prop()
  public currentOrder!: Order;
}
</script>

<i18n>
{
  "de": {
    "orderMessage": {
      "label": "Nachricht bestellen"
    }
  },
  "en": {
    "orderMessage": {
      "label": "Order Message"
    }
  }
}
</i18n>

<style lang='sass' scoped>
</style
As you can see we only display the order message and order items. There is no information about customers. There is also no UI to choose order items. In order to have a good user experience, we will have implement something like an autocomplete and drop down to allow to choose products and customers. If customer doesn’t exist, we should also allow to create a new one. This requires support from backend. For this reason, we will implement this functionality in next post. Now we will stick to this placeholder implementation.
Implementing Order Service
Now we will implement the src/services/orderService.ts
import { Order, getEmptyOrder } from '@/types/types';
import { BaseService } from './baseService';

export class OrderService extends BaseService<Order> {

  // constructors should call parent class with super()
  constructor(endpoint: string, entity: string, requestPrefix: string) {
    super(endpoint, entity, requestPrefix);
  }

  public getEmpty(): Order {
    return getEmptyOrder();
  }
}
So we need to add implementation for getEmptyOrder to our types/types.ts.
class OrderImpl implements Order {
  updated_at: Date = new Date();
  message: string = '';
  inserted_at: Date = new Date();
  id: number = -1;
  details: object = {};
  customer_id: number = -1;
  creation_date: Date = new Date();
  order_items: OrderItem[] = [];

  /* Mapped Types in Typescript.
   * Partial<T> makes all fields of T as optional.
   * This allows us to just update the values for passed in init(which itself is optional with?) and assigns to our object.
   * Then we initialize like new CustomerImpl({name: "MyName"})
   */
  public constructor(order?: Partial<Order>) {
    Object.assign(this, order);
  }
}

// Factory methods
export function getEmptyProduct() {
  return new ProductImpl();
}

export function getEmptyCustomer() {
  return new CustomerImpl();
}

export function getEmptyOrder() {
  return new OrderImpl();
}
Similarly add src/store/modules/orders.ts.
import { VuexModule, Module, getModule, Mutation, Action } from 'vuex-module-decorators';
import store from '@/store';
import { Order } from '@/types/types';
import { OrderService } from '@/services/orderService';

/**
 * When namespaced is set to true, contents of the module is automatically namedspaced based on name.
 * Vuex allows adding modules to store dynamically after store is created, we set it to true.
 * store is the Vuex store to which we need to insert our module.
 */
@Module({
    namespaced: true,
    name: 'orders',
    store,
    dynamic: true,
})

class OrderModule extends VuexModule {
    /**
     * Class variables automatically become part of the state.
     * Our module thus will have orders/allOrders and orders/service as state variables.
     * The reason we put service inside Vuex is because in this case there will be only one OrderService
     * which can be shared between all components.
     */
    public allOrders: Order[] = [];
    public service: OrderService = new OrderService('http://0.0.0.0:4000/api/v1/', 'orders', 'order');

    // Action automatically calls setOrders function with arguments returned by fetchOrders function.
    @Action({ commit: 'setOrders' })
    public async fetchOrders() {
        // Calls into service to get all orders
        const t = await this.service.getAllRequest();
        return t.data.data;
    }

    // modifies our module state, by setting allOrders to p.
    @Mutation
    public setOrders(p: Order[]) {
        this.allOrders = p;
    }
}

// Export our module so our components can use it.
export default getModule(OrderModule);
As you can see, this file is almost the same like src/store/modules/products.ts. We can just copy products.ts and replace Product with Order and product with order to get this file.
So now the only thing left to do is to add the new order components to router.ts.
//src/router.ts
    {
      path: '/orders',
      name: 'orders',
      component: () => import('./components/order/OrderList.vue'),
    },
    {
      path: '/orders/add',
      name: 'add-order',
      component: () => import('./components/order/AddOrder.vue'),
    },
    {
      path: '/orders/edit/:id',
      name: 'edit-order',
      component: () => import('./components/order/EditOrder.vue'),
      props: true,
    },
Now we should be able to add new order at localhost:8080/orders/add. Similarly we can view all orders at localhost:8080/orders/.
In next section, we will add an autocomplete with search functionality and improve the UI for creating new orders.